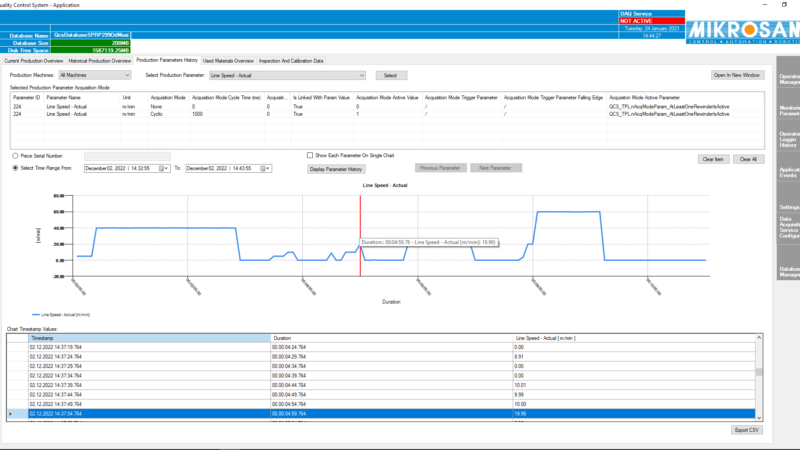
Quality Control System (QCS) is a software solution developed by Mikrosam that is used for quality control of the products created on Mikrosam’s machines.
During the machine production process, this software monitors and records all important process parameters, which can later be used for production historical overview and analysis. All recorded data is kept in a local database and can be used to recall historical part production data at any time.
Key Features

Data Acquisition
The QCS is connected to the machine’s control system and records the important process data, machine state data and data from any machine hardware unit (machine axis, sensor, load cell, etc.). For any process parameter, the following sampling rates are available:
- Cyclic up to 2ms
- Value change
- Value change within tolerance
- On Trigger
The sampling rate of all process parameters is adaptive to the current machine state to avoid unnecessary recording and storage usage.

Monitoring of program data and break/stop time information.
The QCS records every loaded part program (NC Program) in its database so it can provide an overview of all part programs used in the production process.
For every usage of a part program, the active and stop time are recorded, enabling later analysis how much time was needed for the execution of each program and all programs in total. Every production stop event also is recorded.

Raw Data Processing
All raw data that is collected with the DAQ process, is processed to provide meaningful and easy-to-read output. Once the raw data is processed, data segments are created so the raw data can be accessed using smaller and more meaningful segments.
For example, for AFP/ATL machines, data segments are created and can be displayed per ply or per course.

Assigning a Serial Number to the machine’s final product
All collected data can be linked to a product with a unique serial number. The operator can assign a serial number for each product manufactured on the machine.
Because all raw and generated data is linked to a serial number, it is possible to search for any data using the product’s serial number.

Data analysis with reports
The raw and generated data can be displayed or exported from the database for further analysis. The data can be displayed using:
- Raw Data report – The user can view a graphical representation of the raw data by selecting one or more process parameters recorded in a specific time frame.
- Interactive report for created data segment – The user can select a created data segment and see all the available data for that segment.
Any recorded data can be exported in the standard file formats or specific file format based on customer request.

Label Printing
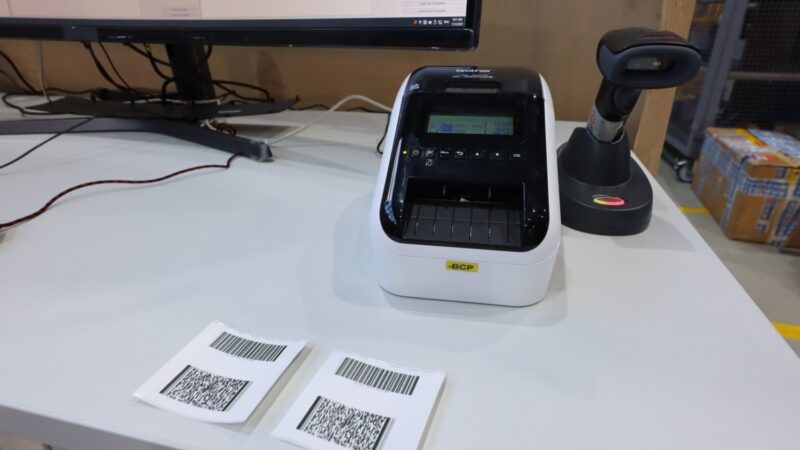
Using a label printer, QCS can print a custom label that can be applied on the machine’s final product. The label contains the serial number of the product, its most important properties, and a barcode that can be scanned. The design of the label, what data to be displayed and the type of barcode can be adjusted to suit the customer needs.
Integration with customer’s existing systems
Since the QCS is entirely developed by Mikrosam, it’s possible to create custom QCS modules for custom integration with customer’s existing systems. The integration means the QCS can make Data Acquisition from customer existing equipment and/or export data from QCS database to customer’s existing databases.
Inspection System
In-Process Layup Inspection System (IPLIS) is part of the QCS, designed for visual inspection of layup with AFP or ATL machine. This inspection detects various layup errors.
The IPLIS is unique technology developed by Mikrosam. The hardware component of the system consist a laser line projector and a 3D cameras that when combined together form a profilometer. The high framerate profilometer records the entire layup and using the software component it can detect any layup errors in-process.
All data from the camera is stored in the QCS database and can be displayed and analyzed after the layup. Because the IPLIS is part of the QCS, all recorded data and detected defects can be linked with the rest of the data that the QCS already is recording.
The IPLIS can detect layup errors during the actual machine layup. Some of the type of errors can be detected are:
- Gap width is more than expected.
- Overlap between tows or courses.
- Twisted Tow
- Missing Tow
This inspection system is based on the IPLIS and can be used for detection of the errors on the slit tape before it is re-wound on the spool. It is developed by constant input by customer requirements for increasing demand of high-quality error free slit tape that in later stage can be processed in Automated Fiber Placement (AFP) or Automated Tape Laying (ATL) machines.
This system is working independently and is installed at each of the rewinding positions at the winding spool section and is continuously monitors and detect errors on the slit tapes that are going to be wound to spools.
The list of errors that are detected and recorded are:
- Tape Width is out of tolerance.
- Tow thickness is out of tolerance.
- Fuzz detection
- Twisted Tape detected.
- Foreign object detection
- Splice position detection
All data from the camera is stored in the QCS database and can be displayed and analyzed after the re-wounding. Because the IPLIS is part of the QCS, all recorded data and detected defects can be linked with the rest of the data that the QCS already is recording.

 ENG
ENG

